Tuesday, February 5, 2013

Grungy Prim Mason Jar Vase


So this was my first attempt at making something grungy. I think I did a pretty good job. I painted the jar with a brown paint that I liked. Then I mixed up a little homemade mod podge to that I added some vanilla extract, nutmeg and cinnamon. I covered the jar with two coats of that. Now I need to decide what to put in it.

Valentines Heart Garland


Heart Garland and my prim angel bunny. Country Crafting Momma

So I've been looking all over pinterest trying to find different ideas for decorations for valentines day. I've been seeing lots of different posts for paper heart garlands. I really liked the idea but wanted it to fit in with the prim style and to make it last longer than paper.( I like to be able to reuse them for a couple of years)  I used some light cardboard (food packaging) and painted it a country red color. Then I folded the strips in the center to form the point of the heart. Then I turned the other ends into each other and glued them together while also adding little yarn loops on the tops.  Then I  strung them all on a long piece of yarn and hung them up on my T.V. mantel. They look really cute. What I like best is that by making them out of cardboard I will be able to save them and use them again next year.

There are lots of other blogs out there with tutorials. If you need a tutorial or some inspiration check out some of these blogs.


Or check out my Pinterest search for a few more great ideas.


Tuesday, January 29, 2013

Farmhouse Tables.....Lots of DIY's

I love farmhouse tables and really really want to build one for my little family to use as a dining table. We are getting ready to move soon so I can't get into building one right now, but in the mean time I've been collecting different websites and blogs with plans and tutorials. I hope to have a pretty good list here.

I found this on For Rent's contest link. I like the idea that this one has extensions.

 
I found this one on East Coast Creative. I like the idea of using an old table or two as your base. Makes the process easier. 
 
 
I really like the design of this one. It's an Anthropologie knock off. The only thing I don't like is with the  leg design on the ends it would be hard to pull your chair up too far on the ends. You can find all the info on this design on Shanty 2 Chic.
 
 
I found the next one on A Swell Place to Dwell. I love the way the color is on the top. I don't dig the two tone idea. I think it would look awsome all the same color as the top.


This next one is again an idea on using an old table for the legs and base. It comes from a blog called Garage Sales R Us. I like this idea, but once again I would like to see it all one tone. I really do like all the distressing that they did. Great job.


I hope that you have found this post helpful. I have tried to get a pretty good list. If you know of any other blogs that should be included with this list please let me know. I would love to add them. Thanks. 


Thursday, January 24, 2013

Oh So Simple....Chinese Fried Rice.....

Chinese Fried Rice.....That amazing "side" dish that I can make a meal of. I love going out to the local chinese spot and eating my weight that wonderful stuff. There is only one problem......It's expensive.  I was on Pinterest the other day when I came across a great idea.....Make it at home. I found a great recipe on another blog called Life as a Lofthouse. Check it out for some great Fried rice. I made a couple of changes though....

I doubled the recipe and used brown rice. I also added more onion. Plus I didn't use the sesame oil. I just used a bit of veggie oil..... It came out soooooo good. My husband, who is usually a bit skeptical about the things I find online, loved it. I plan to make it often.

Tuesday, January 15, 2013

Handmade Cardboard Barn Stars for Primitive Decor


I'm just getting started on redecorating our home. Last year we moved from California to Kentucky and in that move left almost all of our decor items behind. I was bummed at first but now I see I pretty much have a blank slate to work with.  I have fallen in love with the Primitive style of decorating but it can be so expensive.....In comes thrifty me.  I found that I can easily make them with some thin cardboard, (like some different food packaging) or cardstock for inside decorating. I have so many idea's of what i can do with them. I'm going to show you how easy it is to do........

Step One: Find a five point star pattern in the size you like. (In my case I had an old scrapbook stencil)


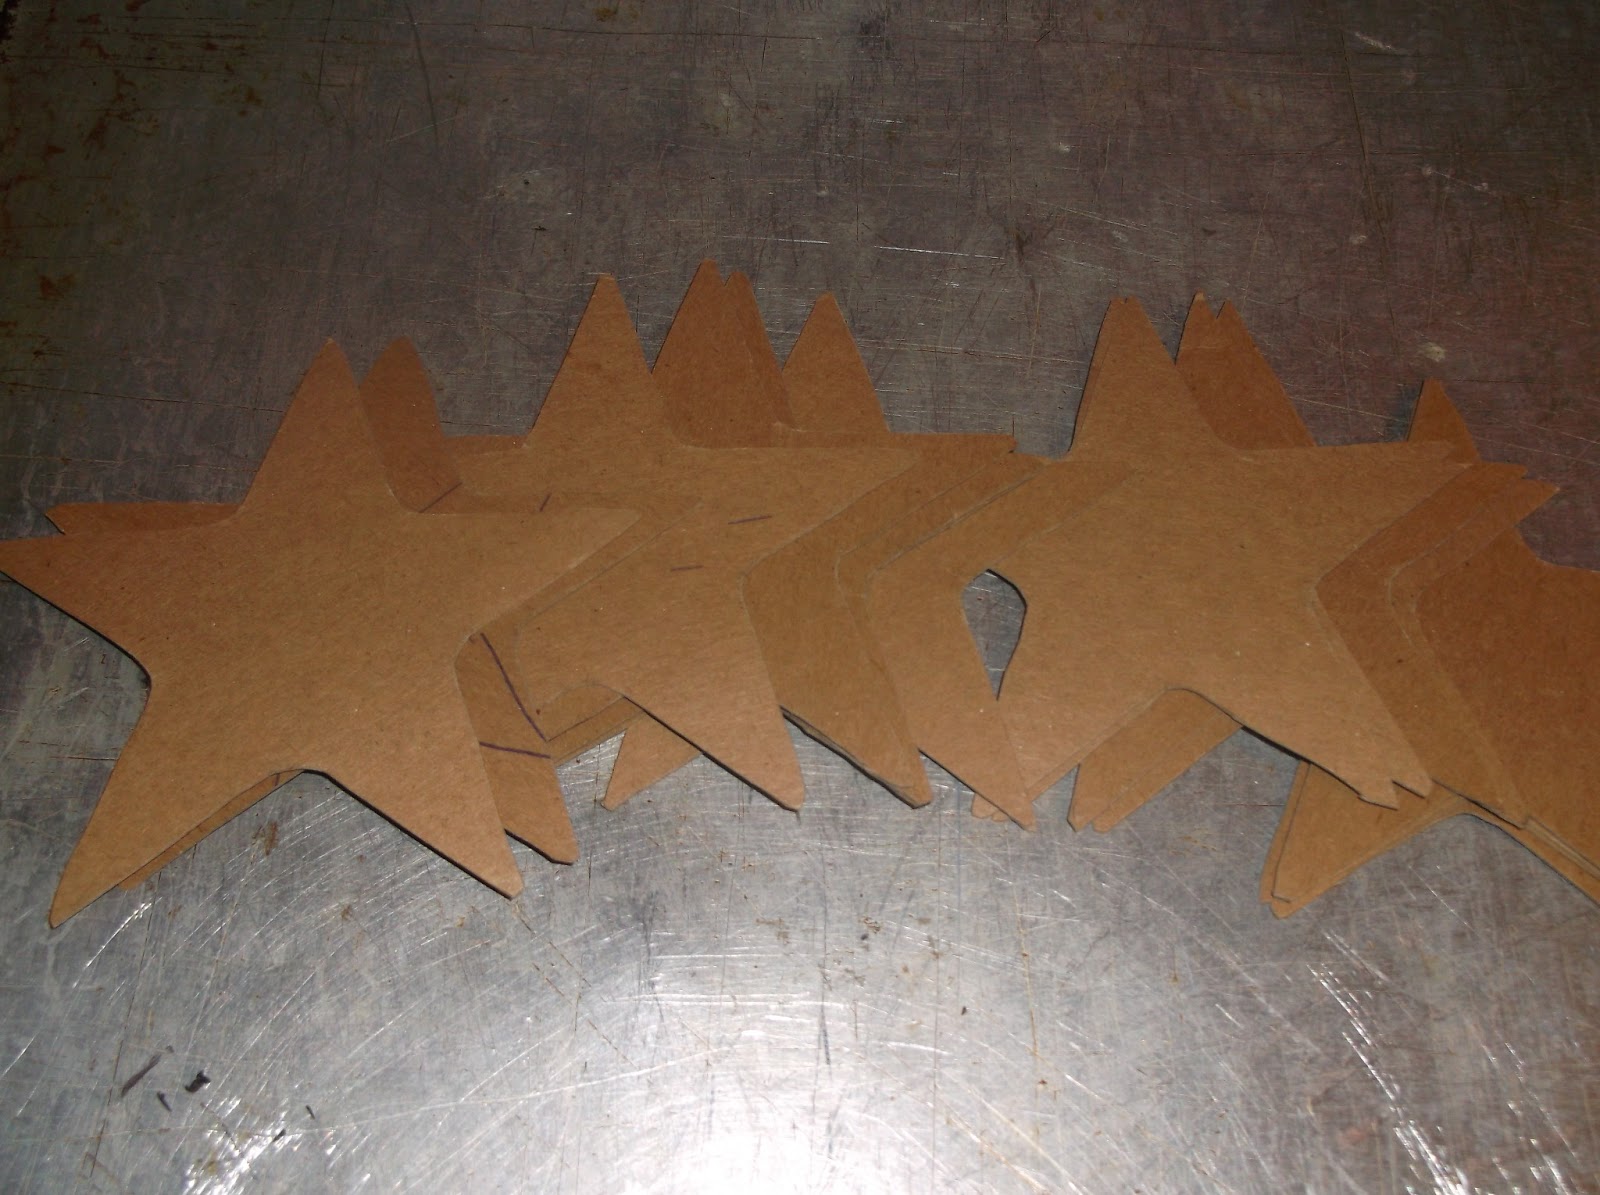
Step Two: Trace and cut out stars.


 Step Three: Score stars from point to point. Use a ruler if you have trouble with straight lines. I didn't have one of those neat tools to help with this step so i used an old plastic cuticle tool. (It worked great)

Step Four: Fold on your score lines.


Step Five: Add paint. This is where you can get creative. I like to add some black paint first on the raised folds and sometimes at the tips or edges. Then I paint and allow the black to show though wherever it does. After the paint drys you may want to pinch your folds again to make your star pop out again.


Now If you'd like to hang you'll need to use some hot glue or tape to add a loop to the back of the stars to hang. I'm planning a few different things with my small stars. I'm going to be making some garland and wreaths for the fourth of July, Halloween, and Christmas. Keep a look out closer to those holidays I'll post about those garlands.

It's time for you to get busy. Have fun and add your personal touches to your new "Barn Stars".

God Bless.

"The moon and stars to rule over the night, for his steadfast love endures forever;"
Psalm 136:9 ESV

Sunday, January 13, 2013

Southwest Egg Rolls or Burritos, Chili's Style


My husband and I have always loved Chili's Southwest Eggrolls, but don't eat there often due to the cost. I was on Pinterest one day and came across a recipe for them. I got my recipe from http://deep-fried.food.com/recipe/chilis-southwest-egg-rolls-18319. I liked this version because it allows you to change the amount of servings that you want to make. I found one problem though...I asked for 20 servings and upon making them I got 13 servings. I think it's because we made them so fat.  They were SOOOOOO GOOD. I don't really like to fry foods so next time I think I'm going to make the filling and use it as burrito filling. I'm not gonna lie. This meal seems like it takes forever to make, but it's worth it. Happy Cooking.

Thursday, January 10, 2013

Flavorful Pumpkin Pie Pudding


We love pumpkin pie at our house but we don't eat alot of it because it's not very good for you. I have heard of pumpkin pudding before and decided to give it a try. I looked at tons of different recipes and didn't really like any of them. So I took a few of them and changed them until i came up with this. It's wonderful and no sugar added. (Both my husband and I are diabetic so this is a plus).

If sugar isn't an issue to you, you could substitute the regular stuff for anything sugar free.

1 sugar free vanilla pudding mix. (any brand)
1 teaspoon pumpkin pie spice
1 can (15oz) pumpkin
1 teaspoon vanilla extract
1/2 cup sugar free maple syrup (any brand)
3/4 cup or 6oz either plain or vanilla yogurt
1 tub cool whip
3-4 graham crackers (made into crumbs)

Mix dry ingredients in a large bowl. Add pumpkin, maple syrup, yogurt and vanilla extract. Mix well with spoon or whisk. Fold in 3/4 cup Cool whip. Divide in to 6 equal serving cups. Top with your desired amount of cool whip and graham cracker crumbs.  Refrigerate for 30 minutes before serving.